I Grew Microgreens Indoors for a Year and This Is What Happened
Some of our posts on Microgreensguru.com contain affiliate links. If you click on an affiliate link and make a purchase, we may receive a commission. Clicking on an affiliate link that earns a commission does NOT result in additional charges or costs you extra. Earnings from affiliate links help keep this website running. See our full affiliate disclosure here.
Ever wondered how to grow microgreens indoors year-round? I did, and it led me on a journey that transformed my life in ways I never expected. Growing these tiny, nutrient-packed greens became more than just a hobby; it became a passion that brought joy, health, and a sense of accomplishment to my everyday life.
But let’s be real – it wasn’t all smooth sailing. There were challenges, surprises, and plenty of lessons learned along the way. If you’re curious about the ups and downs of indoor microgreen cultivation, stick around. I promise you won’t be disappointed.
Why Grow Microgreens Indoors?
Before we dive into the nitty-gritty of indoor microgreen cultivation, let’s take a moment to appreciate why these little greens are so awesome. Here are a few key benefits:
- Nutritional Powerhouses: Microgreens are packed with nutrients, often containing higher levels of vitamins and minerals than their mature counterparts. Talk about a superfood!
- Year-Round Freshness: By growing microgreens indoors, you can enjoy fresh, homegrown greens even in the dead of winter. No more sad, wilted store-bought greens for you!
- Space-Saving: Don’t have a sprawling backyard? No problem! Microgreens can be grown in small spaces like windowsills or countertops, making them perfect for urban dwellers.
- Fast and Easy: Most microgreens are ready to harvest in just 1-2 weeks, and they require minimal effort compared to traditional gardening.

Getting Started: Essential Equipment
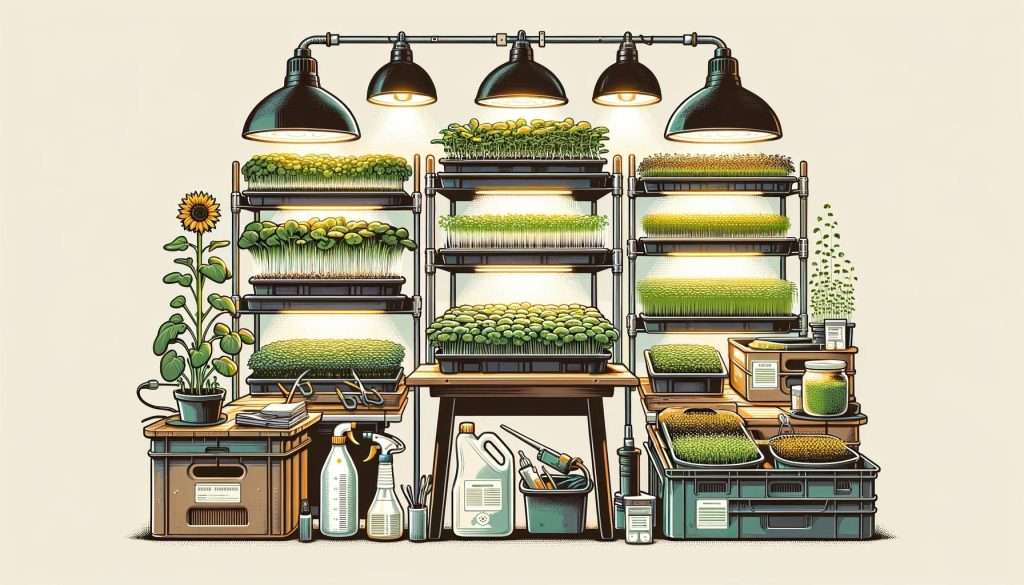
Alright, let’s talk equipment. To get started with indoor microgreen growing, you’ll need a few key items (you might even have some of these lying around already!):
- Growing trays: You can use just about anything from recycled plastic containers to fancy, purpose-built microgreen trays.
- Growing medium: Microgreens can be grown in soil, coco coir, or even hydroponically.
- Seeds: The fun part! Choose from a wide variety of microgreen seeds like broccoli, radish, sunflower, and more. My favorite vendor for microgreen seeds is True Leaf Market.
- Spray bottle: For keeping your greens moist and happy.
- Light source: While a sunny window can work, investing in grow lights will give you more control over your microgreens’ growth.
My personal setup is pretty simple: I use a stack of 1020 trays (the standard size for microgreens), a 50/50 mix of coco coir and perlite, and a couple of LED grow lights. Nothing too fancy, but it gets the job done!
Planting and Caring for Your Microgreens
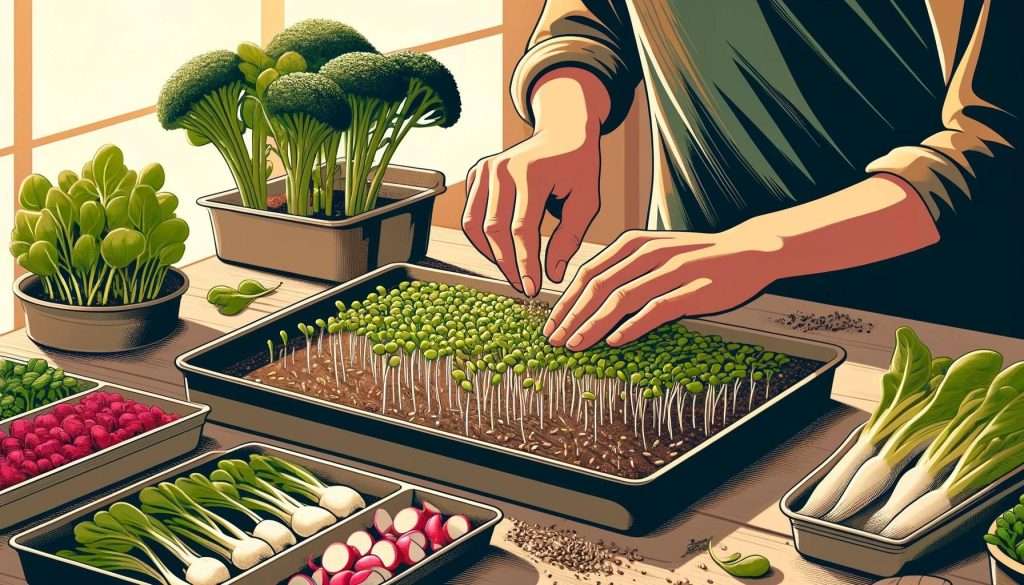
Now for the fun part: planting your microgreens! Here’s a basic rundown of the process:
- Fill your growing tray with your chosen medium, making sure it’s moist but not waterlogged.
- Sprinkle your seeds evenly over the surface. The seeding density will vary depending on the variety you’re growing.
- Gently press the seeds into the medium, and give them a light misting with your spray bottle.
- Cover the tray with a lid or another tray flipped upside down to create a dark, humid environment for germination.
- Once the seeds have sprouted (usually within a few days), remove the cover and place the tray under your light source.
- Water your microgreens as needed to keep the medium moist, but be careful not to overwater, as this can lead to mold issues.
As your microgreens grow, you’ll want to keep an eye out for any signs of trouble, such as yellowing leaves or fuzzy white mold. If caught early, most issues can be remedied with better airflow or adjusting your watering habits.
Choosing the Right Microgreens for Your Indoor Garden
When it comes to selecting microgreen varieties for your indoor garden, the options are nearly endless. Some of the most popular and easiest to grow include:
These varieties are known for their fast growth, robust flavors, and impressive nutrient profiles. Plus, they’re pretty darn tasty if you ask me.
If you’re feeling a bit more adventurous, you can also try your hand at growing microgreens like amaranth, cilantro, or fennel. Just keep in mind that these varieties may require a bit more TLC and patience compared to their easier-going counterparts.
Ultimately, the microgreens you choose to grow will depend on your personal taste preferences and level of growing experience.
My advice? Start with a few tried-and-true varieties, and then branch out as you gain confidence in your microgreen growing skills.

Benefits of Growing Microgreens at Home
Beyond the sheer satisfaction of harvesting your own homegrown greens, there are plenty of other reasons to give indoor microgreen cultivation a try:
- Freshness: Homegrown microgreens are as fresh as it gets, often going from tray to plate in a matter of minutes.
- Quality Control: When you grow your own microgreens, you have complete control over the growing process, from seed selection to harvesting practices.
- Cost Savings: While the initial setup costs may be a small investment, growing your own microgreens can save you money in the long run compared to purchasing them at the store.
- Environmental Benefits: Indoor microgreen cultivation requires minimal resources and can help reduce your carbon footprint by eliminating the need for long-distance transportation.
- Educational Opportunities: Growing microgreens can be a fun and educational activity for kids and adults alike, teaching valuable lessons about plant biology, nutrition, and sustainability.
Harvesting and Enjoying Your Homegrown Microgreens
After 1-2 weeks (depending on the variety), your microgreens will be ready to harvest. Simply snip them off at the base with a clean pair of scissors, give them a good rinse, and they’re ready to eat!
I like to use my homegrown microgreens as a garnish for sandwiches and soups, mix them into salads, or even blend them into smoothies for an extra nutrient boost. Trust me, once you’ve tasted the freshness and flavor of homegrown microgreens, you’ll never go back to store-bought again.
Tips and Tricks from a Microgreen Growing Veteran
Before we wrap up, I wanted to share a few tips and tricks I’ve learned over the past year of growing microgreens indoors:
- Experiment with different varieties to find your favorites. Some of my personal go-tos are broccoli, radish, and sunflower microgreens.
- If you’re dealing with mold issues, try increasing airflow around your trays with a small fan or by propping them up on a wire rack.
- Don’t be afraid to get creative with your growing setup! I’ve seen some pretty ingenious microgreen growing systems made from repurposed bookshelves and even old filing cabinets.
- If you find yourself with an abundance of microgreens, try sharing them with friends and neighbors. Who knows, you might just inspire them to start growing their own!
Growing microgreens indoors has been a rewarding and delicious experience for me, and I hope it will be for you too. Remember, even if you run into a few bumps along the way, keep at it! With a little patience and practice, you’ll be a microgreen growing pro in no time.

My Personal Experience and Opinion
Now, I know what you might be thinking: “This all sounds great, but what’s the catch?” Well, I’ll be honest with you – there were a few challenges I faced along the way.
For one, I had to deal with the occasional mold outbreak. It’s not fun, and it can be pretty discouraging to see your little green babies covered in fuzzy white grossness. But, with a little trial and error (and a lot of googling), I learned that the key to preventing mold is all about airflow and proper watering techniques.
Another challenge I faced was figuring out the right lighting setup. I started with a simple sunny window, but quickly realized that my microgreens were getting a bit leggy and pale. After investing in some proper grow lights, I saw a noticeable difference in the color and vigor of my greens.
But, despite these challenges, I can honestly say that growing microgreens has been one of the most rewarding hobbies I’ve ever taken up. There’s just something so satisfying about watching those little seeds sprout and grow into delicious, nutritious greens – all with minimal effort on my part.
Plus, as someone who’s always been a bit health-conscious, I love knowing exactly where my food comes from and what goes into growing it. No more mystery greens from the store for me!
Key Takeaways
- Microgreens are nutrient-dense, fast-growing, and easy to cultivate indoors year-round.
- Essential equipment for indoor microgreen growing includes trays, growing medium, seeds, a spray bottle, and a light source.
- Popular and beginner-friendly microgreen varieties include broccoli, radish, sunflower, pea shoots, and leafy greens like arugula, kale, and spinach.
- Growing your own microgreens offers numerous benefits, such as freshness, quality control, cost savings, environmental sustainability, and educational opportunities.
- With a little experimentation and practice, anyone can become a successful microgreen grower and enjoy the fruits (or rather, the greens) of their labor.
Frequently Asked Questions About Growing Microgreens Indoors
- Q: Can I grow microgreens without grow lights? A: While it’s possible to grow microgreens using natural sunlight from a window, using grow lights gives you more control over the light intensity and duration, resulting in more consistent growth.
- Q: How often should I water my microgreens? A: Watering frequency will depend on factors like the growing medium, ambient temperature, and humidity. As a general rule, aim to keep the growing medium consistently moist but not waterlogged.
- Q: Can I reuse the same growing medium for multiple microgreen crops? A: It’s best to start with fresh growing medium for each new crop to avoid potential issues with soil-borne diseases or nutrient depletion.
- Q: How do I store harvested microgreens? A: After harvesting and rinsing your microgreens, store them in an airtight container lined with a damp paper towel in the refrigerator. They should stay fresh for 5-7 days.
- Q: What’s the difference between microgreens and sprouts? A: While both are young plants, microgreens are grown in soil or another growing medium and harvested above the ground, whereas sprouts are germinated in water and consumed whole, including the seed and root.
Final Thoughts
In the end, my year-long adventure in indoor microgreen growing taught me a lot – not just about the plants themselves, but also about the joys of growing something yourself and sharing it with others.
Sure, there were a few hiccups along the way (I’m looking at you, pesky mold), but the satisfaction of harvesting my own fresh, nutrient-packed greens made it all worth it.
So, if you’re thinking about diving into the world of indoor microgreen cultivation, I say go for it! With a little bit of equipment, some quality seeds, and a dash of enthusiasm, you’ll be well on your way to enjoying your own homegrown microgreens year-round.
Trust me, your taste buds (and your body) will thank you.
Until next time, happy growing!

Cal Hewitt is the Founder and Lead Cultivator at Microgreens Guru, a website dedicated to empowering individuals to grow, consume, and potentially sell nutrient-dense microgreens. With 5 years of hands-on experience in microgreens cultivation, Cal brings a unique analytical perspective to the world of urban agriculture. He specializes in optimizing growth techniques for various microgreen varieties, while also focusing on sustainable and cost-effective growing methods. Cal’s passion for microgreens, ignited by a personal health journey, drives him to continuously explore and share innovative approaches to microgreens cultivation. His practical experience, combined with his commitment to education through his website and upcoming book, ensures that Microgreens Guru remains a valuable resource for both novice and experienced growers alike.


